Replacing Ceiling Fan
Whether you are replacing ceiling fan or looking how to install ceiling fan in your house, you will be happy to know that it is not all that difficult.

Ceiling fans are great. They move the air around cooling off the room. I have installed them in every bedroom in all the houses we have lived in but have also seen them prove to be effective in living rooms, basements, dining rooms... just about anywhere. It does not matter whether your ceiling is drywall or plaster, I have done both and replacing ceiling fan install is the same.
The great thing about replacing a ceiling fan is that you already have all the electrical you need to do the job. If you have a light in the ceiling in spot that you want a fan, follow these how to install ceiling fan instructions and it should not take you more than 90 minutes to accomplish.
Step 1 - Turn off the power
Stop! First thing you need to do is turn the power off. It is quite shocking what will happen when you don't!!! (Pun intended)
Already know the steps of replacing a ceiling fan but need help with the wiring? We have created easy to follow ceiling fan wiring diagrams for every situation.
Step 2 - Removing the old ceiling fan or light fixture
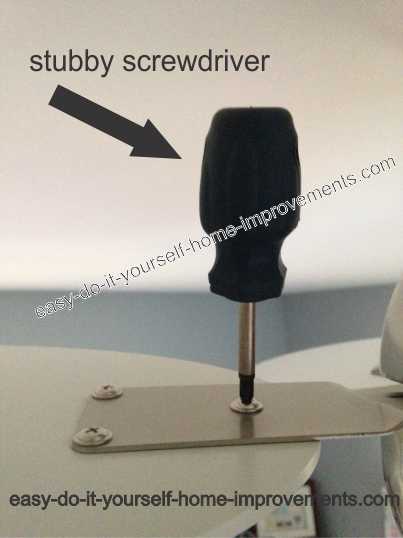
This step is so much easier if you take the blades off of the ceiling fan you are replacing. Sometimes it is a pain because there is little room in between the ceiling and the fan - especially with those ceiling hugger fans. It is wise to use a stubby screwdriver for this, it gives you more room to move and keeps your significant other (a.k.a. Wife) happy that you did not make marks all over the ceiling. If you are taking a light fixture down, you do not need to worry about blades, but be careful with the glass shade or globe. Remove it carefully from the old light fixture. Unscrew the nuts or screws that are holding your fixture in place. Once that is done you will notice that it is still being held onto the ceiling with wires. Twist off the wire nut and the wires should disconnect.
Did you know?
Lots of people wonder which direction for ceiling fan?? You might not know but you want the ceiling fan to turn in different directions in summer than you would in the winter. In the summer the fan should be turning counter clockwise direction to get the most breezes on you. When it is winter the fan's direction should be clockwise and set at a low speed, this will force the warm air down during the cold months.
Step 3 - Check out the electrical box
Not all ceiling fans can be hung from a regular electrical box. When replacing ceiling fan, some are quite heavy and with the fan blade movement you want to make sure your electrical box is attached to a joist or a 2x4 brace between two ceiling joists. This is really great if you have attic access. If you do not have attic access, they sell an adjustable hanger bar and ceiling box. You can install these bars through the existing electrical box hole in your ceiling. When you put the hanger bar through the hole, twist the bar until both ends hit the joists, then tighten with pliers. Then install the special ceiling electrical box in place. This will give the fan the support it needs.
You need to make sure that your ceiling fan is grounded. Twist the bare wire around the grounding screw usually green inside the electrical box, leaving a long tail. You will attach the green ground wires to this later when wiring up the fan.
Step 4 - Installing the ceiling fan plate or fan mounting bracket

Take the ceiling fan mounting bracket and pull the wires through. Screw the mounting bracket to the electrical box with two long screws (should come with the fan).
Step 5 - Installing the ceiling fan
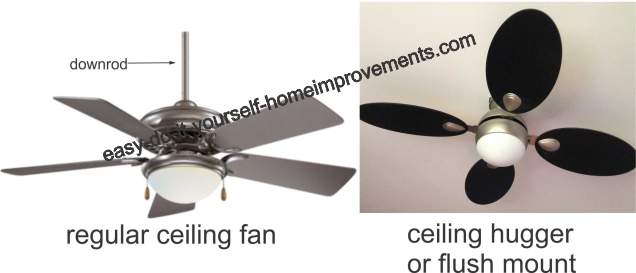
There are many different looks when you buy a ceiling fan, but two major differences are fans with a downrod and ceiling huggers great for low ceilings. If you have a ceiling fan with a downrod, you will thread the wires through the downrod and secure it to the base with the screws provided. Check the manual to make sure you secured it properly. If you have a flush mount ceiling fan, attach the housing and canopy to the ceiling fan motor.
Now some people put the fan blades on at this point. I prefer to keep them off so they are not in my way when I hang the motor on the ceiling.
Some fans come with a hanger so that you can suspend the fan safely while you are attaching the wires. If yours comes with this option, use it. It will make life so much easier. If not, you will need someone to hold the fan while you hook up the electrical.
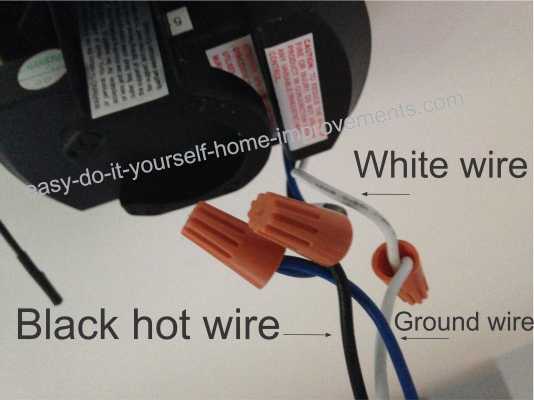
Remember our tutorial on wiring a light switch??? The same applies when replacing ceiling fan. Black wires are hot-they hold the power. Twist the black wires together and secure with a wire nut, then do the same with the white wires. If there is a bare or green wire, wrap these to the tail of the ground wire you secured earlier, and use a wire nut to secure them. Place all the wires into the electrical box.
Step 6 – Attaching the fan to the ceiling
When replacing ceiling fan, this step should only take a few screws. The canopy should fit over the electrical box finishing the job nicely. Now at this point, I would attach the fan blades if you have not done so already.
Step 7 – Assembling the light fixture when replacing ceiling fan
When you are replacing ceiling fan, everyone is a bit different so attach the light fixture to the fan by following the manufactures instructions. Screw in your light bulbs and you should be ready to go.
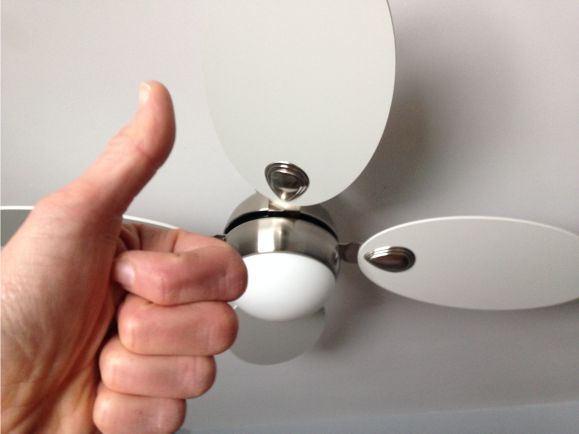
Turn the power on and check out your fine handy work of replacing a ceiling fan, all by yourself!
Hey, doing it yourself is great but if you are unsure of the advice given or the methods in which to job is done... don't do it. This site is merely a collection of how some people do home improvements. There is no way we can anticipate every situation and we do our best to inform of any risks for each job. Be sure to check local building codes for proper installation and permits.
If in doubt, hire it out.
Recent Articles
-
Wiring A 3 Way Switch?
Mar 09, 21 10:00 PM
 Need help wiring a 3 way switch? With easy to follow diagrams and instructions, you can have that convenience in no time.
 -
Wire a Switched Outlet
Mar 09, 21 09:56 PM
Want to turn a lamp on with a light switch? Sometimes it is handy to have an outlet controlled by a switch. Step by step instructions on how to wire a switched outlet -
Switched Outlet Wiring Diagram
Mar 09, 21 09:44 PM
 Looking to have an outlet be controlled by a switch? Follow my switched outlet wiring diagram to learn how.