How To Install A Toilet

You want to know how to install a toilet. You think to yourself, "It can't be all that difficult..."
Well, you would be right. It isn't difficult at all.
Not only is installing a toilet not difficult, you can save big $$$ on water costs.
Did you know that your toilet probably uses at least 13L (3.43 US gal) every time you flush it??
Installing a new toilet will cut that water usage in half and that will stop "flushing" money down the drain so to speak.
Step 1 - Removing a toilet
The method of installing a toilet in a new bathroom is essentially the same as doing removing a toilet The only difference being you would have to remove the old toilet first.
This is easily achieved by either following these instructions backwards or (in some cases) breaking the toilet into bits and disposing of it. -- Although this is more fun... it is also very messy! --
Let's begin by identifying a few basic things when learning how to install a toilet.

There should be a toilet flange in the floor (as shown in this picture), a toilet shut off valve either in the wall or coming out of the floor, and a new toilet nearby waiting to be installed.
If your bathroom does not have a toilet shut off valve, I would highly recommend that you get one installed.
Step 2 - Wax ring for toilet
Take the toilet bowl out of the box and lay it upside down on some cardboard or piece of carpet.
Remove the wax ring for the toilet from it's packaging and press it onto the bottom of the toilet while gently turning it from side to side. This will "stick" to the bottom of the bowl so when you flip it over and onto the flange, it will not fall off.

Put the toilet bolts in the slots in the flange.
Place the bowl on the flange ensuring that the bolts go through the holes and are sticking straight up.
Push down on the bowl so the wax ring is smooshed (yes, I said smooshed) and seals the bowl to the flange.
Tighten the bowl to the floor. Be sure to put the plastic bolt cover plate on first, then the washer and then the nut. Do not tighten on bolt fully before the other bolt. Tighten them both at the same time (jump back and forth) to be sure that the bowl is level and doesn't crack.
Now you can install the tank. This is the next step in how to install a toilet.
Step 3 - Toilet tank parts
Depending on the type of toilet you are installing, this step can vary a little bit.
Generally the toilet tank parts are two bolts that hold the tank on and a large rubber gasket that goes between the tank and bowl.
Slip this rubber gasket on around the pipe that is on the bottom of the tank. Be sure the taper is facing the correct way. (small diameter at the bottom)
Place the tank on the bowl and insert the bolts through the holes. There will be a rubber washer for inside the tank a steel washer and nut for outside.
Tighten the bolts in the same fashion as the bowl and make sure you don't over tighten!

Step 4 - Attaching the hoses
The easiest way to get water to you toilet is with a braided hose. You can pick these up at any hardware store for a minimal cost. Some toilets even come with the hose.
Attach the small end to the toilet shut off valve and the large plastic end to the toilet. Just hand tight at the toilet is sufficient. When people are learning how to install a toilet, they like to tighten the daylights out of everything. It is not always a good thing to over tighten. Broken porcelain and stripped threads will be more of a headache than a slight leak that can be easily stopped.
Now you are ready for testing. Ready? Ok, turn on the water... Slowly...
Let it run so you just have about an inch in the tank and shut it off.
Look and feel around the tank to see if there are any leaks. If you do have a leak, they can usually be fixed by tightening the area that is leaking.
No leaks? Great, turn on the water again and let the tank fill up. Adjusting the toilet bowl water level in your quest on how to install a toilet can be easily done with a Phillips head screwdriver or by adjusting the height of the float.
Again, depending on the brand of toilet, this can be different. Check the owners manual for the correct way to adjust your toilet.
Once you are happy with the toilet bowl water level and the way the toilet flushes, you can put on the toilet seat.
Have any toilet repair questions? Need some additional advice on how to install a toilet...don't hesitate to contact us

To finish off this toilet installation, cut of the excess length of the bolts and out on the bolt caps.
To cut the bolts off, I use a good pair of side cutters. If the bolts are too thick for that, you can use a hacksaw. Just be careful not to scratch the porcelain.
Well, there you have it.
Now you can tell all your friends how to install a toilet easily.
Learn How To Solder Copper Pipe
-- Wondering if you can get that copper plumbing installed or fixed? You can with these easy to follow instructions.
--Before calling in the plumber or using chemicals, you may be able to unclog the shower drain with some good old fashion elbow grease.
How To Install A Washing Machine
-- You can learn how to install a washing machine easily. Great washing machine plumbing tips and advice!
--With step by step instructions, you can learn how to install a dishwasher yourself.
Wanting to hook up the Ice Maker in your Fridge?
--Have your family enjoy ice from the fridge when you learn to install an ice maker.
Hey, doing it yourself is great but if you are unsure of the advice given or the methods in which to job is done... don't do it. This site is merely a collection of how some people do home improvements. There is no way we can anticipate every situation and we do our best to inform of any risks for each job. Be sure to check local building codes for proper installation and permits.
If in doubt, hire it out.
Recent Articles
-
Wiring A 3 Way Switch?
Mar 09, 21 10:00 PM
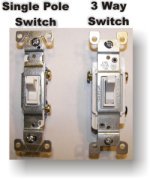 Need help wiring a 3 way switch? With easy to follow diagrams and instructions, you can have that convenience in no time.
 -
Wire a Switched Outlet
Mar 09, 21 09:56 PM
Want to turn a lamp on with a light switch? Sometimes it is handy to have an outlet controlled by a switch. Step by step instructions on how to wire a switched outlet -
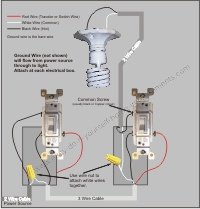
Switched Outlet Wiring Diagram
Mar 09, 21 09:44 PM
 Looking to have an outlet be controlled by a switch? Follow my switched outlet wiring diagram to learn how.

