Install Ice Maker in Your Fridge

To install ice maker in your fridge isn't difficult. Although each refrigerator ice maker is different, they all have basically the same instructions.
Speaking of instructions, be sure to read over the instructions that came with your fridge. There may be some specific instructions for your type of ice maker.
Ice Maker Installation Kit
Since you are reading this, you may have been advised to buy an ice maker installation kit. Although these kits do work, I am not a big fan of the saddle valve that is usually included. This valve works by piercing an existing copper water line to feed the ice maker.
These instructions will not mention the saddle valve, but if you are wanting to use one because of ease, no problem. Just substitute my ball valve and adapters for the saddle valve.

The only real differences when it comes to fridge ice makers is where you are getting the supply of water. An unfinished basement is handy for this and if your basement has drywall ceilings, you could always get it from under the kitchen sink. Maybe a nearby bathroom, laundry room or furnace room? If you have a reverse osmosis system under your sink or other filtration system, you will want to splice off of that line. Any cold water pipe will do.
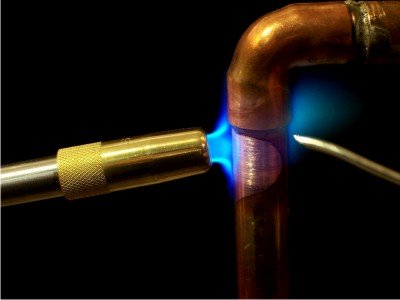
Once you have located a cold water pipe that you want to use, you will have to cut the pipe and solder in a "tee" fitting and a ball valve. This will allow you to shut the water off only to the fridge in case of leaks, repair or simply replacing the fridge itself.
I have an example of a hook up with the reverse osmosis system.
In this case, the basement ceiling is finished drywall so I will not be going through the floor. I will have to drill through the cabinets at the back to run the line to the fridge. You can use either flexible copper tubing (3/8" outside diameter) or a plastic tubing. I chose the plastic tubing for this application.
Since we need to splice off the supply line - or "tee" off - we will need some compression fittings, brass inserts and plastic ferrules.
Materials for Installing Ice Maker

Install Ice Maker
Ready to start and install ice maker? Great. Start drilling through the cabinets with a drill bit only slightly bigger than the outside diameter of the tubing. This will make it look a lot nicer and help hold the tubing in place.

Now we can snake the tubing through the holes. (Plastic tubing is better for this particular scenario because it is way more flexible than the copper).
Turn off the water supply and open the tap. These reverse osmosis systems are usually plumbed in with plastic tubing as well so in order to splice into the line, you only need to cut the tubing with either a pair of tubing cutters or you can use you side cutters. It doesn't matter how you cut it, just make sure it is nice and square for the ice maker install to go smoothly.
Compression fitting assembly

Now we can install the "Tee". Slide a brass insert into each end of the tubing. (should be three) then slide the nut and plastic ferrule on the tubing. The tee most likely came with brass ferrules. Don't use these because they will cut the plastic and you will have a shower.
Push the tubing into the ends of the tee and tighten the nuts. You don't have to be Hercules when you tighten these. Tighten by hand, then 3/4 to one full turn with a wrench will be enough.


It is basically the same at the fridge end. Before we do that, though, you should run the water through the tubing and into the sink (or pail) to clean out and debris. You do not want any remains from the plumbing or splicing clogging up your line causing the ice maker not to work. Once this is clean, attach the adapter compression fitting to the end of the tubing and attach to the fridge. I had to use this adapter because my tubing is 3/8" diameter and the tubing on the fridge is 1/4" diameter. When you go to the hardware store to buy your supplies, they should be able to point you in the right direction.
Now you can push your fridge back in and enjoy fresh ice and cold water right from your fridge.
I must say that you should read the instructions that came with your fridge regarding installation and what to do after it is hooked up. In this case, the manufacturer recommends disposing of the first three full batches of ice to ensure that the mechanisms are clean.
Install ice maker was not too difficult after all! Enjoy and stay cool.
Hey, doing it yourself is great but if you are unsure of the advice given or the methods in which to job is done... don't do it. This site is merely a collection of how some people do home improvements. There is no way we can anticipate every situation and we do our best to inform of any risks for each job. Be sure to check local building codes for proper installation and permits.
If in doubt, hire it out.
Recent Articles
-
Wiring A 3 Way Switch?
Mar 09, 21 10:00 PM
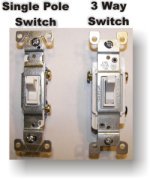 Need help wiring a 3 way switch? With easy to follow diagrams and instructions, you can have that convenience in no time.
 -
Wire a Switched Outlet
Mar 09, 21 09:56 PM
Want to turn a lamp on with a light switch? Sometimes it is handy to have an outlet controlled by a switch. Step by step instructions on how to wire a switched outlet -
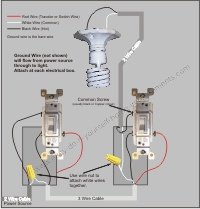
Switched Outlet Wiring Diagram
Mar 09, 21 09:44 PM
 Looking to have an outlet be controlled by a switch? Follow my switched outlet wiring diagram to learn how.
